Friday, April 29, 2011

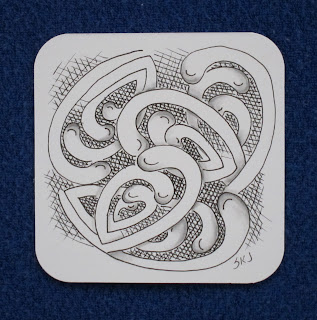
A rose for the wedding

Congratulations Will and Kate!

I was up at 3:30 this morning. Thanks to my DVR I could back up half an hour and then skip through the commercials during the early part. The wedding was beautiful and I thoroughly enjoyed seeing the guests at Westminster. So many beautiful hats! And my personal favorite was that women looked absolutely gorgeous in dresses that had SLEEVES! I hope U.S. designers will take note and start selling more dresses for those us us who don't want bare arms!

When I did this tangle I used a tile that I had done a watercolor technique on using my new Tombow markers. I had a blast doing them and you will see a lot more of those backgrounds on posts to come. Next week I'll post some pictures I took to show how I did the backgrounds.

Thursday, April 28, 2011

April 27th class at Banbury


Six lovely ladies joined me to learn all about Zentangles at Banbury Fair yesterday. Two of them had looong drives and I really appreciated the effort. One lady had a rough morning and was a little late, but once she got into her zentangle zone she was much happier. Aah, the power of tangling!

We had an exciting variety of tiles emerge. I love seeing how different personalities emerge through their artwork.   Thanks ladies!

Wednesday, April 27, 2011

more light over dark


Using the basic string technique I kept going with light over dark. The highlights are a white chalk pencil and shadows use a black chalk pencil.

Tuesday, April 26, 2011

Light over Dark challenge - More Morris


These two tiles both use the same black cardstock - but they were photographed at different times of the day - and one used the camera's flash. I considered doing them again but I thought it would be more interesting to see how different lighting and camera settings can have such different effects.

They are my response to the latest challenge from 'the diva'. http://iamthedivaczt.blogspot.com/ I used a combination of white ink, white colored pencil and white chalk pencil. The first tile uses simple patterns and a basic string. I did like the effect I got! The second tile was done after I goggled William Morris images and looked at some of his fabric and wallpaper patterns.

Monday, April 25, 2011

grid patterns

Back to traditional zentangles. This one uses strings based on overlapping ovals. (OK, I'm still thinking eggs.)

The interesting thing about this one is that I did a basic grid on the whole thing first. Then I did a variety of tangles that all are based on a grid pattern. See - It can work when you think 'inside' the box.

Friday, April 22, 2011

Pysanky

Yes, These are all eggs I've done.  Click on picture to enlarge.
Pysanky, Ukrainian Easter Eggs. I've been making these for several years now. I'm not Ukrainian at all. I learned from a girlfriend back in college. That was (ahem) a few years ago. But I got all the supplies and bought a bunch of books, and kept challenging myself. I've even taught some of my friends to keep the tradition going. I make them as Christmas ornaments along with the usual Easter decor.

I've found patterns that I already use in zentangles in my eggs and found some new ones too. My egg books are a great resource for ideas.
 These eggs are all blown out. Traditionally, the eggs are left intact and they dry out naturally. However it's normal to lose a few when the gases cause an egg to explode (small explosion). When it's an egg you are really pleased with it's heartbreaking, so I always blow my eggs out now.
They are done with a wax resist process. You start with a white eggs and apply melted wax with a tool called a kistka. You put the wax every place you want the white to remain. This is usually the 'string'. You put the egg into a yellow dye bath next. Again you apply wax everyplace you want the yellow to remain. This continues through progressively darker colors until you get what you want. Then you remove all the wax. Traditionally this is by holding the egg next to the flame of a candle and wiping the wax off as it melts. When it's all done, I varnish them. There is a good explanation with pictures here.  http://learnpysanky.com/steps.html

Yes, it takes some time do do an egg. I am proud of them and expect my children will be happy to pass them down in years to come.

Thursday, April 21, 2011

Brown Eggs

Did this one last night combining Ukrainian egg patterns, original zentangle patterns, and some new ones that their designers were kind enough to share on the internet.

Brown Sakura Micron pen, brown colored pencil, and white chalk pencil on colored cardstock.

Wednesday, April 20, 2011

Spring wreath

I used all zentangle patterns here. The pens were the colored Sakura Microns and colored pencils were used to shade.

Tuesday, April 19, 2011

Dancing again

Watching Dancing with the Stars again last night. I love the colors, the movement, the excitement. I wanted to capture that in a tile. This uses colored pencils with a little pastel pencil. You may remember I did a tile while watching the show a little while ago. There are so many different motifs and ideas there that I was able to do this second tile without repeatings anything from the first one.

Monday, April 18, 2011

Eggs in the field


I started this tile even before I saw the Diva's new challenge. And as I finished it I realized it followed some of the same steps that a tangle pattern does. Do I really think this is a pattern? No, not really. But I do think that it is interesting to show the steps.

You will notice that I use an oval template. I think that for eggs it's important to get the shape right, and I can't do that freehand. I also found the template very helpful because I wanted to show perspective - I wanted to do my eggs so that the ones further away were smaller than the ones in front. With an oval template like this one, you just pick a smaller oval as you move to the next row.

Color - This one is done with colored pencil. First I put in the white highlight and made it a strong mark. Then I went over the whole eggs with a medium shade of my chosen color. I used a light touch on this first layer. I used the same color on the top of each oval but I used the pencil more firmly. At the bottom of the oval I used a darker shade to round each egg out. I then went back with either a colorless blender or another lighter shade and burnished the whole egg. The grass uses two shades of green.

Friday, April 15, 2011

Getting ready for Easter

As I think more about Easter I'm drawn to oval shapes, flowers and ribbons. When I got this one completed it reminded me of an antique Easter card. Plus I got to use some of my favorite patterns; n'zeppel, purk, paradox, and my own Zhostovo border.

Thursday, April 14, 2011

15 minute challenge

15 minutes is not a lot of time to do a zentangle when you really enjoy the detail work. But I'm pretty happy with the way this one came out. I really had the urge to do it in color though. The flowers outside are making me ready for spring!

Wednesday, April 13, 2011

La Bel colored tile

La Bel is used in this tile with a colored background. The background is done with watercolor paints spattered into a wet background. The tangling was done with a purple Micron pen. Additional shading was done with a purple colored pencil and highlights with a white chalk pencil. Truly a 'mixed media' piece!

Tuesday, April 12, 2011

LaBel - new tangle pattern

enlarge by clicking on picture
LaBel is a pattern based on a border I saw on a painted Russian tray. On the tray it was painted in gold, as most Russian trays are. I saw a pattern that would lend itself well to zentangle.

-Start with a line of simple spirals and alternate the direction you pull them.
-Add two humps (or the top of a heart shape) from the top of one spiral to the next.
-Dots go at the middle of the two humps.

Embellish and shade as desired.

Monday, April 11, 2011

new growth (and tease of new pattern)

What a wonderful weekend we had. The weather hit 80 degrees yesterday! All the flowers started to open. We are babysitting my daughter's dog so we had a good reason to take looong walks. Then at night I opened all the windows and tangled with the fresh air.

The new pattern you see here as the border will have a name and instructions in tomorrow's blog entry.

Friday, April 8, 2011

Mooka challenge


The latest challenge from the Diva is to use the newest official tangle "mooka" in our tile. At the start of the week I didn't feel particularly inspired. Last night I knew that crunch time was here and I frequently need that little push in the tush to get things done. So I was in production mode. The first one was OK but not very inspired so I'm not going to even post it here.

At the top is Mooka in its purest form. I actually think I may like this best.

In the middle tile I used pastel (chalk) pencils. I love the way you can smear them so easily.

The last tile is the one that I did while I was waiting for my son to come out from his practice. I actually didn't get mooka done the way it was designed BUT, as Maria and Rick say, there is no wrong way and each mistake is an opportunity to create something new. So on this tile, I went spiral crazy. This one used the Sharpie pen that I had in my purse.

Thursday, April 7, 2011

Brandywine tangle pattern

Brandywine is my newest tangle pattern. It is based on an architectural element. (Something you might see carved in wood someplace fancy.) Like several of my other patterns, it looks very complicated. That's probably why I love it so much. Broken down however, it's pretty simple to do.

Click the picture to enlarge it and see the details.

When I'm studying a new pattern I start with pencil lines and a ruler. Once I have a feel for a pattern I can wing it, but it helps the first few times.
- Draw two parallel lines with your pencil -divide into even sections using ruler
- Draw circles and dashes, alternating them. On the second line do the same dashes and circles - start with the opposite of the first line.
- Next come lazy S shapes (by lazy S I mean that the curve is barely there)
- Start the S just a little below the dash on the top line. Bring it down to connect with the bottom dash. Turn your paper if that's more comfortable. Continue across the line.
- Flip your paper and continue these lazy S shapes.
- Go to the ends of the dashes that are still there and bring a line down to meet your previous lazy s. Round the corner as you go down and stay parallel to the line already there.
- Flip your paper and repeat.
- Add petal shapes to the three side of the circles.

- Add line work and shading to complete.

Let me know if these directions are confusing. When I get a chance I may do a video for Brandywine.

Wednesday, April 6, 2011

April showers (Tease of new tangle pattern)

The weather is finally warming. Now here comes the rain. But I can't wait for the flowers!

In this tile you will see a tease for a tangle pattern I'll post tomorrow. I just have to check that the name I'm planning is available.

Tuesday, April 5, 2011

What shading can do - DuPage Art piece

 click pictures to enlarge
This is a piece that I showed in progress last week. It's being done on a large scale - the paper is 18" by 24". This will be used in a storefront window to advertise classes.

I wanted you to see what the piece looks like before and after shading. I love what shading does to add to a piece.

Monday, April 4, 2011

Displaying your Zentangles - Part two


A while back I talked a little about display ideas - I want to update you here.

I like to carry basic supplies with me all the time but I like to keep my purse as light as possible. I discovered an inexpensive photo album/brag book works well for me. I found mine at Joann's Fabrics and Crafts for 99 cents. I keep finished tiles in the front of the book and blank ones in the back. My pen clips right to it. This means I also have finished pieces ready to show to people when they ask what a zentangle is.

Sometimes I am so pleased with a piece that I want to frame it. When I was at Michaels Crafts this morning I found a four pack of frames for $9.99. They included the glass and mats too. (Not the highest of quality - but I can always upgrade later.) Square frames can be hard to find, so I'm always looking.

Finally I found Michaels also carried the display cubes. Another tangler found them and posted the info so off I went. I searched the store over and over. Finally I asked for help. When she found them for me, they were on the very top shelf and we needed to find a ladder! But they are only $2.99. Just examine them carefully when you buy them. If they were ever dropped they may have cracks.

Friday, April 1, 2011

Zentangle classes at Banbury Fair

Zentangle basic classes have been scheduled at Banbury Fair, in Bartlett, IL. The dates are Wed, April 27th and Sunday, May 1st, 2011. Both will be from 1pm to 3:15pm. Cost will be $35.00 which includes a mini zentangle kit. Signup will be through Banbury Fair. Phone numbers are  630-837-1727 and 630-837-1677. Their website is http://www.banburyfair.com/webpages/BanburyFair.html.

If you've never been to Banbury before I can promise you a very enjoyable time. They have converted an old house to contain several small shoppes. There are art supplies, unique jewelry and gifts, beautiful baby clothes, a women's boutique, antiques, ice cream, and more. A surprise around every corner!