Saturday, April 25, 2020

April tiles


Like many of you, I'm somewhat stressed during the quarantine. Every little headache, any scratchy throat, or slight cough has me wondering if I've got 'it'. Thankfully, I'm still healthy. But what to do about the stress?
I'm finding some relief in tangling. The best stress relief is coming from doing the online classes that several teachers are offering from around the world. Even though I usually like to 'think outside of the box' I find that simply following along with a class, doing the same tangles as everyone else, and not having to make any decisions, is the most relaxing for me. Thank you, Thank you, Thank you!!!!
The tiles in the picture are from classes with Mindandtangle, Annie Taylor CZT and Neha.Agrawal.

Monday, April 13, 2020

when life gives you lemons .......


When life gives you lemons ...... make lemonade.

That expression is so appropriate right now. Everyone is staying home - and staying SAFE. And that's a very good thing. But like so many of you, I've been going stir crazy. Buuuut, Zentangle to the rescue. There have been a number of CZTs and other artists that have been teaching classes online - both paid and free classes. They are through Facebook, Instagram. and even Zoom.

I am so thankful for these resources. It gives me sanity, it gives me a schedule to look forward to. And the best thing, it's started my creative juices flowing again.

The artwork above has all been done within the past month. I have the names of the artist that tauight the class on the back of most of these pieces - but not all of them. I'm trying to remember them all but I've forgotten a few. If you start with the large piece in the left lower corner, Tracy Weissapfel, - blue zendala ??? - Top brightly colored piece on black, Eni Oken, - Upper right, Annie Taylor CZT,  - piece to the right of the black was done in a ZOOM meeting with the Prairie Tanglers, - Renaissance Zendala was with Romi Boraz Marks, - Daisies were with Trish Pellitier CZT, - and the tiles in the lower right were with Sonya Yencer.

That's just the ones in the picture above. I've done a number of other things too but they are not all finished yet so they are not pictured. Actually, some of the things in the picture are not finished either but I'm still thinking about what to add.

My wishes for all of you - Stay home, stay safe, stay healthy, and let those creative juices flow!

Wednesday, March 4, 2020

Spring zendala

It's not quite spring, but my daffodils are starting to come up. It won't be long before they start to bloom. We are starting to see some slightly warmer temperatures too so a spring zendala was in order.

This was done using a PN micron and colored pencils for the color. I used a circle template to get my spacing the way I wanted it. Otherwise, it's all freehand.

Happy Spring!

Saturday, February 8, 2020

Trinity


When I saw the stepouts for the tangle pattern Trinity I knew I wanted to play with it. I wanted to challenge myself a little so I did it in the round. This zendala began with light pencil lines creating my circles. Then I did a wash of clean water within the lines. I dropped in color from my Ecoline brush markers using a watercolor wet on wet technique. The tangles were done with a blue Micron pen. Shading was done last with colored pencils, See below for a picture before the tangles were added. It was  taken just after I figured out that I needed to divide the section into triangles before I did Trinity.


Wednesday, January 29, 2020

playing with Khala


Khala is a new tangle from Anica Gabrovec, CZT. I've seen a number of variations done by others on Facebook. There have been some real beautys! I tried a few little ones but then I started this one.  The colors were done with with my Ecoline brush markers and at first I wasn't very happy. So I added a color wash and dropped in additional color. It was much better! I then did the tangle variation and added a few more tangles for good measure. Finally I added colored pencil in selected areas. Fun.

Tuesday, November 12, 2019

Spirals in a zendala inspired by Book of Kells

Spirals in a zendala inspired by Book of Kells


I recently took a class in Celtic calligraphy at the Irish American Heritage Center in Chicago. It was taught by renowned calligraphy artist Denis Brown. I learned so much. Not just about calligraphy, but also about the Book of Kells and the three manuscripts that preceded it and influenced it. The Book of Kells is a glorious manuscript with wonderful illuminations, knotwork, and so many details. It actually is available online if you are interested in seeing it yourself.

After the calligraphy class I came home and wanted to do more. I went through my stash since I vaguely remembered getting some stencils from Jenny Perruzzi a while back. They were all influenced by knotwork. One of them was a stencil that was a spiral. I didn't think much of it when I first got it but now, WOW, it is the same shape as the spirals in the Book of Kells.

Below I used the spiral stencil and then added extra tangles. The colored picture above was done with colored pencils - and inspired by the colors I saw in the Book of Kells. Then I added the Latin words for the Father, Son and Holy Spirit. In a tiny space it was challenging to do proper Celtic letters.

Jenny doesn't have these stencils in her Etsy store right now, she's actually got her shop, Acadia Laser Creations on hiatus right now. But if you ask her .........


Saturday, November 2, 2019

Fall Zendala


I've been seeing several pieces done with colored pencil lately so I was inspired to pull out my colored pencils and go for one of my own. Thank you to everyone who inspired me!

This started with a small quilting stencil in my stash. Once I had the basic lines I added a few embellishments and a few simple tangles. Then I grabbed my Prismacolor colored pencils. I tried to pick colors that reminded me of fall leaves - but of course, when I added the purple, I kind of went out on a limb.That was fun!

I apologize for the lack of posts last month. I had a bit of a dry spell. If you have a dry spell too, please don't worry about it. Your mojo will come back when you are ready.

Monday, September 9, 2019

Rose Window


Shortly after the fire at Notre Dame, Jenny Peruzzi came out with a stencil based on the Rose window. Of course I had to buy the stencil and finally had a chance to really play with it. It's an intricate stencil and you can use the whole thing to make a big mandala or just use part of the stencil as I did here. Look at the picture below for the stencil itself.


First I traced the stencil lightly with pencil. I used my Inktense pencils in a somewhat random manner so I could get really strong color. I wet the pencil drawing carefully to blend the colors. I then outlined each shape with a gold gellyroll pen. The gold is hard to see unless you really enlarge the photo.


These are the colors I used.

The stencil is available through Jenny's Etsy shop - Acadia Laser Creations. It may not be in stock right now - contact Jenny if you are interested,

Thursday, August 29, 2019

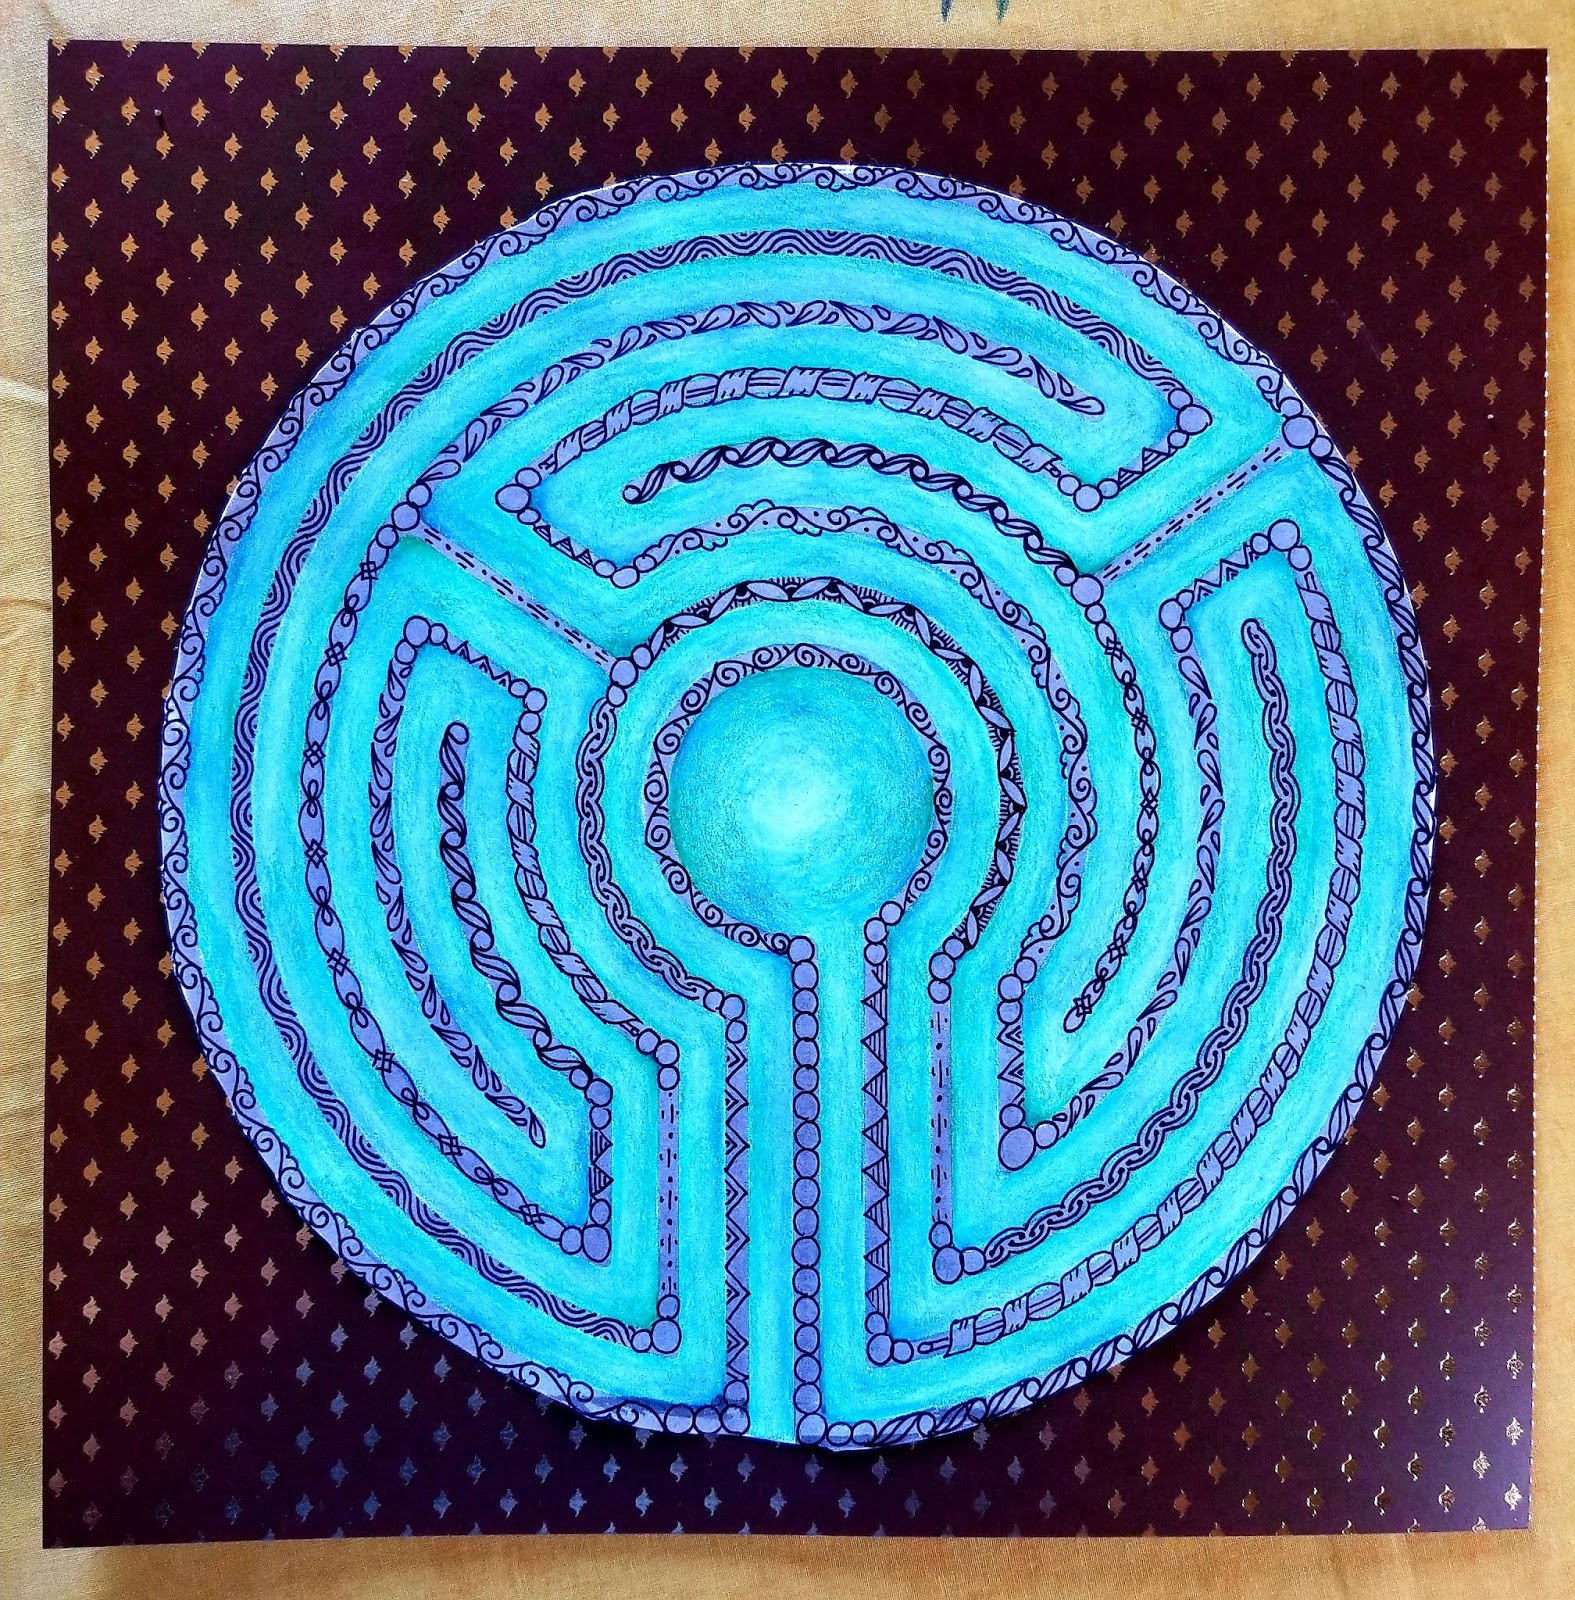
labyrinth


At the last Prairie Tanglers meeting we were given a template for this labryinth. It was just the gray lines you can see behind the tangles. Each of us added color of our choosing. I used an assortment of blue and green Derwent Intense pencils. Then I used water on a brush to smooth and blend the colors together. I then started tangling on just the gray lines with a Tombow Monotwin pen. Sue Reading, who taught the class, cautioned us against adding additional color after the tangling as the penwork might bleed. However, the Tombow monotwin has a different type of ink so I was able to adjust the color to my heart's content. By the way, I can't tell you any more about the pen as all the small print is in Japanese. But it sure was fun to have that freedom!

You will see the tangles I used were smaller ones as the space I had for tangling was pretty narrow. Many of the tangles are mine and you can find the stepouts under the tab marked 'tangle pattern gallery'. Several other people at the meeting did their tangles in the larger spaces - it was interesting to see the variety.

Tuesday, July 30, 2019

OH string with rounding


I saw a post on Facebook that used a continuous, loopy string. Auras were added and then corners were rounded. I don't know exactly who originated it but I decided to take the concept and run with it.

I used one of my colored zendala tiles and a blue micron pen. I used my tangle OH instead of one continuous string. If you look at the picture below you can see the OH was done three times. I added auras and the rounding where it seemed appropriate. That's the stage in the picture below.

It needed more though, so I added a few 'worms' with striping. It still needed more so in came Pokeleaf. Shading with colored pencils and some highlights finished it.


Tuesday, July 2, 2019

tangling on shells with color


Tis the season - to tangle on shells again. I started with just my black pens but then I was asked, "can we add color?" So I experimented with my Inktense pencils and this is what I came up with.

The one on the right is my first attempt. I used my IDentipen. I used the thicker side of the pen as the thinner side didn't show up well on the outer side of the shell. I then colored in with my Inktense pencils. I wet them with water and the color filled in nicely. Occasionally the water bled along the lines of the shell. So I added the lines in the background and - well, most of the lines that bled are hidden now.

The shell on the left was the next one. This time I used my Microperm pen and drew on the inside of the shell. As this side was much smoother, it took the ink better. When I did the color with the inktense pencils I applied the pencil only in small areas. When I wet it with my brush I carried the color into the other areas, thus giving me more of a shaded effect.


These are some of the shells I've done before. They have been on my blog before but I didn't want you to have to hunt to find them.These were done with a Microperm pen. (I think).

Happy summer!

Thursday, June 13, 2019

seaglass tangling


I love tangling on different surfaces. And with summer finally starting I was excited to find a way to do something new to me!

Seaglass is one of those things that is fun to look for on the beach. For those of you who aren't familiar with seaglass, it's bits of broken glass that have been worn smooth and frosted by the action of waves and sand.

Now I actually didn't find these large pieces on the beach. I was in a glass designers shop and they had a bin of glass pieces they had put into a rock tumbler. I was able to get a cup full of tumbled glass pieces for $4.00.  In the picture you will see three pieces - one that I didn't do any tangling on so you could see how it starts. I put a small circle of white paper beneath them so you could see through the glass.

I tangled on these with a Sakura Microperm pen. I find that this pen works on all sorts of odd surfaces so it's my go to pen for plastic too. I didn't add shading with a pencil - just a few small lines or stippling with the pen.

Have fun - and have a great summer!

Saturday, April 6, 2019

Easter Eggs!


Easter will be here before you know it and there's not much time left for Easter crafts. So I'd like to show you my fast, easy, and cheap Easter craft. They are great for both Zentangle fans and kids alike.

Make a trip to your big box, hobby store and look for a Giga, oval, paper punch. (Bring a coupon for that store or find a coupon online) Then go over to the rack of poster boards and pull out the pastel colored sheets. Cardstock paper will work too but I really prefer the thickness of poster board, especially if you are planning to hang these up. Grab a white gel pen (I like the Sakura Gelly roll pens). You will also need colored pencils that will shade whatever color posterboard you have chosen. 

Punch out the oval shape from the poster board.
Draw one tangle per egg - and draw it BIG! I promise it will be easier and faster if you draw it big.
When the ink is dry add shading with a colored pencil.
Punch a hole at the top for hanging.


You can also do these with colored pens. Then you can shade with the colored pencils and highlight with the white pen and/or a white chalk pencil. The two eggs above use the tangle pattern Raphael by Sandy Hsiao.

Monday, March 18, 2019

HaWy


HaWy - a tangle pattern from Holly Atwater CZT, is the challenge here. It's definitely a high focus tangle. It took me a few times before I got the hang of it - and it's still pretty uneven. The floral pattern was added to disguise the edges that were looking pretty wonky. But I'm glad I tried it!

Thursday, February 28, 2019

Turning tangles with butterflies


The tangle keeps turning!

I thought I had done enough of my turning tangles but then I was shopping and found a butterfly punch. And it was on sale! So of course, I had to have it. My mom had a number of framed butterflies in her bathroom- and now they are in mine, so butterflies have always been very special to me.

I had fun playing with different color schemes. See the picture below to see what I did. Note that the picture below also shows the upper tile before I added shading.